How To Add a User Accounts In Windows 11 [Complete Guide]
Microsoft recently introduced a new desktop operating system – Windows 11. Compared to the previous versions of Windows, Windows 11 offers you more features. Also, the new operating system from Microsoft has a smoother appearance.
If you are using the preview version of Windows 11, you may know that Microsoft has made some changes to the user account settings. On Home windows 11, you need to be connected to the internet to create a new user account.
Windows 11 Pro, on the other hand, gives you more options for creating local user accounts. So, if you are looking for a way to add a local user account in Windows 11, you are reading the right article.
 |
| How To Add User Accounts In Windows 11 - Techno Ashwath |
Steps to Add User Accounts In Windows 11 (Complete Guide)
In this article, we will share a step-by-step guide to Add User Accounts In Windows 11. The process will be easy; You need to follow some simple steps given below.
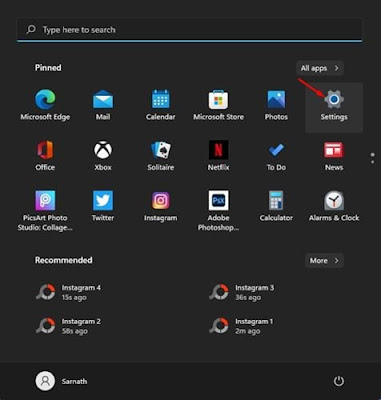
Step 1. Click the Windows 11 Start button and select ' Settings .'
Step 2. On the Settings page, click on ' Accounts '. The Account options are located in the left pane of the screen.
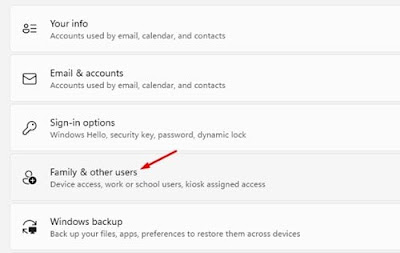
Step 3. In the right pane, click on 'Family & other users.
Step 4. On the next page, click on the 'Add account' button behind Add another user.
Step 5. Click on I don’t have this person’s sign-in information
Step 7. You have to enter the user information for the local account on the next page. Enter the username, password, password hint, and click the ' Next ' button.
Step 8. Account will be created. To remove an account, click ' Remove ' behind the local account.
Finished. This is how you can add user accounts in Windows 11.
The Knot
I hope you understood How to Add a User Account in Windows 11, If you facing any issues in adding user kindly leave a comment below, I will try to help to solve the issue.


